Showing posts with label crunchy. Show all posts

Thursday, February 21, 2013

Goin' Crunchy~ Disinfectant Towels


Are you familiar with those disposable, disinfectant towelettes (yes that is a real word...) that come in the cylinder shaped containers. The very convenient, snap tight lid, pull the towelette through the perfect shaped space on top to use anywhere, anytime, for almost any cleaning emergency wonder invention? I love those things!

I used to have one in the bathroom, one in each vehicle, one in the kitchen.... I was a disinfectant towelette (yep still a word, feels weird typing it..) kinda gal. By now if you have read anything in my Goin' Crunchy section you know that I love a clean house. I also love fun cleaning supplies. I just enjoy the satisfaction and it was pretty much bred into me so it isn't going away anytime soon.

I have been, for about a year, searching out ways to clean without the chemicals, and without the cost. Enter in my love for instant cleaning towels (oh so much better..) and a want to get back to natural items and what you get is my version of the Disinfectant Towel!

I searched the internet last summer and never really came up with what I wanted that would work for us. I pieced together a few different recipes from here and here and then made it work for us!


Disinfectant Towels

White Vinegar, Tea Tree Oil, Lavender Oil, Water

Bucket of Rags


Water and Oils
Pouring

Disinfectant Towels
2-3 Cups of distilled water*
2-3 cups of vinegar
20 drops of Tea Tree Essential oil
20 drops of Lavender Essential oil (you could use Lemon, Grapefruit, Peppermint...)
Large Bucket with a seal tight lid. We use an old gallon size ice cream pail.
Assorted rags. We have old mismatched socks, cut up bath towels, several torn up ancient t-shirts and apparently according to that picture someone's old Hanes boxers.

Start by cleaning your utensils and bucket in hot, soapy water. *To make distilled water bring filtered water to a boil and then cool. Mix together the water, vinegar and oils. In the large bucket place your assorted rags. I started this process by folding them all and placing them nice and neat in the bucket. After the third time I decided they would get just as wet all crumpled up and so now they just get thrown in. :) Pour your vinegar/water/oil mixture over it and seal it up.
Use as needed and then throw the soiled rags in the laundry and when your bucket is empty start all over again.

We use these everywhere and go through them quite quickly. If you don't have a potty training child that misses the toilet on occasion or any boys that miss the toilet daily you may need less. Last summer I carried a smaller version to my daughter's softball games to scrub yuck off of dirty fingers and dusty bleachers.

Let me know how it goes!

Always Blessed,
Gretchen :)

Possibly Linking With:

Sunday, February 10, 2013

Make Your Own Brown Sugar *Recipe


 "It is the sweet, simple things of life which are the real ones after all."~ Laura Ingalls Wilder
cane sugar and molasses


I grew up making brown sugar every time we had a need for it. Somewhere along the line I stopped making it myself and resorted to buying it simply because it saved me an extra 3 minutes in my kitchen. I started up again last year to save me the three dollars and because I have been trying to get back to the basics. The ones I learned from my mama as a child.

Since I am head chef and baker in this house, we are transitioning into more honey, molasses, and (slightly less refined) cane sugar and using much less refined white sugar. I am not the sugar police; just trying to do better with more whole type kind of foods. 

I have yet to see a brown sugar substitute of a healthy variety in my local area, so I decided to give my childhood brown sugar recipe a try with the cane sugar I have using. The granules are larger and look different so I wasn't sure.

It turned out lovely! I have used it interchangeably in several recipes that called for regular brown sugar. I see no noticeable difference in taste or texture. *I'm not sure how it would work in candy, such as a caramel. If you try it let me know!

cane sugar

molasses

mixing

brown sugar!

Brown Sugar
1 cup cane sugar (or white sugar)
1/8-1/4 cup dark molasses 

Mix with a fork until the molasses is fully incorporated. The less molasses the lighter the brown sugar. Use more molasses for darker brown sugar. The cane sugar does not 'pack' into a measuring cup as well but I have had no problem with it working. Use equal measure for regular brown sugar.


Always Blessed,
Gretchen :)
Possibly Linking With:

Quote from: http://www.searchquotes.com/quotes/author/Laura_Ingalls_Wilder/3/

Thursday, February 7, 2013

Goin' Crunchy~ DIY Furniture Polish


Lemon Juice, Olive Oil, and Lemongrass Essential Oil

I really like how furniture polish smells. The lemony fragrance brings me back to my childhood. I have chatted before on how much I love to clean. Sometimes to a fault. I think it was probably groomed into me from the time I was able to hold a cloth and dust. 

The house I did most of growing up in was an old turn of the century two story farm house. My mother would run about fruitlessly trying to keep up with the country dust that whipped across the open fields and deposited rich black topsoil and brown gravel road dust all over the house. The wood floors caught it and so we dusted those daily. The couches and coffee table hid dust of the bunny variety. So there was weekly cleaning to catch those gray fuzzy bunnies. In the summer, when the windows were let open to bring in a breeze, I could wake up and find dust on the kitchen table in a light layer just waiting , begging me to write HELLO with my pinky finger. We rinsed cups before using them even if they came out of the cupboard. It was really everywhere. 

My brothers were often regulated to more manly type jobs but I honestly think she just didn't trust them to not waste a whole can of dust spray and go through three dusting rags just on the dining room. So my sister and I got to dust. With rags and special dusting mops! With lemony furniture polish that we could spray on the antique, wooden, buffet table and desk that shined it right up.

I love the instant gratification of a good dusting. I mean, you can SEE the clean! And the house smells clean, even if it isn't in the most tip-top shape. So now it is my Prince Ray's job to once a week dust up this house. He generally talks Princess Petunia into helping him and her little 2 year old self is so very proud to help with a big kid chore. He does not think it manly enough but is willing to to do it without complaining (usually) 'for Princess Petunia'. 

A clean dusting of the house always makes me feel better. Yes, I know. Sounding a bit off kilter? I come from a long line of neurotic cleaners. If Lemon Dusting Spray makes me feel better, then so be it. 

So in my search to make my own cleaning supplies I found a good one here and here. I tweaked the recipe and this now my favorite for homemade Lemon Dusting Spray. 


oil


lemon


water


DIY Lemon Dusting Spray
one 4 oz spray bottle
1/2 teaspoon of olive oil
3 teaspoons lemon juice
10 drops of Lemongrass Essential Oil (or lemon, or orange...)
distilled water *
Using a funnel to pour into the spray bottle, combine the olive oil, lemon juice, and essential oils. 
Fill the rest if the bottle with distilled water.

When using: shake the bottle well before using and spray on soft cloth or directly on the furniture. Wipe clean! :) This can be doubled or tripled but I usually just make it as I need to. Smells like summertime and childhood.

*distilled water is just filtered, boiled, and then cooled water. Any possible organisms in your water are then killed and thus a product that does not turn into a science petri dish.

So make some better for you and the environment, frugal, Lemon Dusting Spray and then DUST IT!


Always Blessed,
Gretchen :)

Possibly Linking With:


Monday, February 4, 2013

Rosemary Spiced Squash *Recipe


Last week I shared a recipe for Ginger Lemon Squash. I am getting creative with my cooking because of our blessed abundance of squash. This week we are trying out a new concoction of rosemary, garlic and red pepper flakes! I really liked this one. :)


Rosemary Spiced Squash

Prep squash as per instructions found here.

Add to clean squash cavity:
1 Tablespoon of butter or coconut oil
1/2 teaspoon of dried garlic flakes
1 teaspoon paprika
1/4 -1/2 teaspoon of red pepper flakes
sprinkle of  dried rosemary
salt and pepper
Bake at 350 degrees for 30 to 40 minutes or until soft. Think: mash-able. 

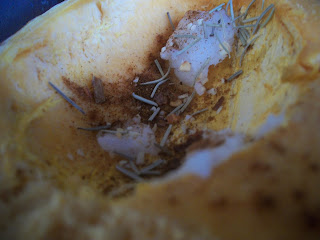
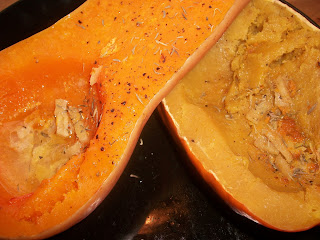
Acorn Squash with coconut oil and spices.

Butternut Squash ready to bake.

Tasty.

Always Blessed,
Gretchen :)

Possibly Linking With:

Friday, February 1, 2013

Goin' Crunchy~ Orange Peel All Purpose Cleaner


Last year I was on a mission to save us some money AND healthy up my house. My sister and I started using all natural, homemade cleaners. I was shocked at how easy and how frugal it was to use homemade cleaners. 

Now, I am a confessed, reformed, cleaning supply lover. I used to coupon clip for exciting new household cleaners. All those shiny colors and comic strip starred 'WOW! All New Formula!" call to me like a siren's song. I also loved those pre-packaged towels with disinfectant super powers. I was a sucker for smelly, linen-scented sprays and sprinkles. Something to scrub the bathroom sink and a different one to scrub the shower. A toilet cleaner, a floor cleaner, cleanser, and window spray all for just the bathroom. Oh yeah, and the blue smelly bar to make my toilet water blue because it somehow seemed cleaner. 

One day while teaching Prince Ray which cleaner was for what so he could do his bathroom 'quick clean' chore (Yes, they take turns quick cleaning the bathroom because it is NOT me or the Princesses that pee BEHIND the toilet. Just sayin'.)I got a wake up call. Prince Ray gives me this slightly confused look and in all his boyishness type honesty says "Why do we need so many!?"

Good question. Do I really need a separate cleaner for the floors and the baseboards? Do I need to have cleanser, and toilet scrubby, and window cleaner, and electronics cleaner, and dust spray, and wood oil, and all purpose cleaner, and de-greaser, and dish soap, and grout cleaner, and... well you get the idea.

Better question is: Do I need to be spraying all of these ridiculous chemicals into the air daily that can affect my family's breathing? Do I need all this fake air freshener and surface disinfectant? What are we breathing into our bodies?! YIKES! 

If you don't believe that your bought cleaning supplies could make you sick all you have to do is a quick google search and be amazed at the number of people whose health has responded positively by dropping the store bought, chemically laden cleaners. I can attest that my asthmatic child is breathing better and using his inhaler 1/3 of the time he was using it. We changed how we eat and we changed how we clean and it has made all the difference in the world. This is of course our personal experience, but it might be worth a try!

On to the recipe! So easy you will be on board for trying it with the next orange you eat!


 Orange Peel All Purpose Cleaner


Peel the oranges! I did 4 this day.


Give the yummy oranges to your children for breakfast!

I use most all the Orange peel. Sometimes I save some out for making Dried Orange Peels.

Place in a glass jar that has a tight fitting lid. This is a canning jar but I have used any glass jar that is available.

 Pour in straight white vinegar to the top. Cover the orange peels.


It is ready to be used when it is orange in color and the peels have begun to sink a bit.

Here are 3 different stages of 'brewing'. Three weeks, two weeks, and just made.

I like to strain it through a small sieve before placing in my spray bottle.

Ready to clean!

We use this for floors, counters, walls, the stove, door knobs, bathroom sink and shower, any mildew, dirty baseboards, yucky, greasy messes and pretty much any other hard surface that needs cleaning. It smells delightful. It is super inexpensive. It uses what I always already have around my house. And... It Works.

Note* I have also thrown in grapefruit, lemon, or lime peels as we have them. They can be a bit acidic but all citrus has natural cleaning and disinfectant qualities. See here for more information.


Always Blessed,
Gretchen :)

Possibly Linking With:


Monday, January 28, 2013

Ginger Lemon Squash *Recipe


Ginger Lemon Squash

Butternut and Acorn Winter Squash

We were blessed with so much squash this fall I have had to start getting creative with the squash side dishes in our world just to keep everyone from getting bored. :) So here begins recipe 1 of 4!


 Winter Squash Basic Baking Instructions
Scrub your squash clean.
Split it in half with a good, sharp knife. It can be difficult. Most winter squash has quite a hard rind. For Butternut Squash you will want to cut it lengthwise.
Hollow out the seeds and stringy stuff. 
You are left with a circular cavity.
Place the squash in a sided baking pan, I usually just use a cake pan, cut side up.
My mom always filled that cavity with a Tablespoon of butter and a sprinkle of brown sugar. (I still love squash this way!)
Now put some water in the bottom of that pan, say 1 cup or so. (It should not cover the squash, just come up a bit on the sides.)
Cover tightly with foil. You are essentially making a steam oven for your squash to bake in.
Bake 350 degrees for roughly 30 to 40 minutes. 
This can vary depending on your squash and your oven. The cooked squash will mash easily if it is done. We often serve it just like this but sometimes I mix it like mashed potatoes with a bit of milk.
There is your basic recipe!

Now for fun try the Ginger Lemon Squash.


Ginger Lemon Squash
Prepare squash as directed above.
Add to cavity:
1 teaspoon (or so) of peeled, grated ginger. ~I did not grate it, but you should. :)
1 teaspoon or so of grated lemon peel
1 Tablespoon of butter or coconut oil
sprinkle of dried thyme
sprinkle of dried rosemary
salt and pepper
Bake at 350 for approximately 30 min as per instructions above.


YUMM-O!


Always Blessed, 
Gretchen :)

Possibly Linking With:


Monday, January 14, 2013

Finding Happy With the Flu & Thieves Oil *recipe

On day one of our Influenza Vacation I felt so horrible I knew it was going to be a long couple of days. I had no idea a week later I would still be having trouble breathing and so weak I need to take a break after doing dishes. It has wiped me out. What a messy sickness. With care though our bodies have all fought off (or are fighting off) the sickness and there is finally a light at the end of this tissue laden tunnel. 

A few things made me so very happy whilst stuck in a constant state of I'm-not-sure-I-will-ever-be-better and tylenol haze. We must find the happy in the bad, right?
Not that I speak in respect of want: for I have learned, in whatsoever state I am, therewith to be content.~ Philippians 4:11
My super amazing husband, took over my role and was a fantastic mom stand in. He took care of the sickies and even had time to go grocery shopping. He kept the healthy kids occupied and did some schooling one day! I was literally out of commission and he stepped up and fully acted on the "in sickness" part of our vows. What a guy! Happy.

My sister gave me a beautiful Teapot that she found out thrifting. Lots of Tea has already been made in this beautiful teapot. Happy.

Isn't it pretty?

Princess Peony shared this week of sickness with me and we spent all kinds of time watching stacks of movies and blowing our noses. We also read. And read. And read. Happy.

source

Princess Peony and I found instant relief for the constant sinus pressure and sore neck with homemade heat packs. Happy.

Heat Packs.

Thieves oil! Makes. Me. Happy. Well it smells divine and when you are sick it soothes coughs if rubbed on your chest and neck. It helped with my sore muscles and joints by massaging it onto affected areas. We also used it in a spray bottle mixed with water as a way to disinfect the air, bedding, doorknobs, tables, and pretty much everything. It made a lovely bath oil and seemed to clear my sinuses briefly after the bath. 

I did not have any bought however and so whipped up my own. I used the recipe from The Hippy Homemaker. I modified it for a much smaller amount. So you can buy it for $35 a bottle or make your own. :)


Thieves Oil

25 drops clove essential oil
22 drops cinnamon essential oil
9 drops eucalyptus essential oil
6 drops rosemary essential oil

This is a hot oil. It is recommended that you mix 1drop of thieves to 4 drops of a carrier oil.

Have you ever used thieves oil? Share your story!

Always Blessed,
Gretchen :)

This post was featured at:
The Welcoming House


Possibly Linking With:
Cornerstone Confessions


Wisdom Wednesdays and Link Up
No Ordinary Blog Hop
Frontline Moms Friday Fun
The Welcoming House
 
Domestic Randomness~ Friday Fascinations