Showing posts with label easy meal. Show all posts

Monday, March 11, 2013

Ham Bone Stock (Bone Broth)

Stock to a cook is voice to a singer.
--Anon.


I have saved vivid memories from my growing years, of the Welcome Home after a long mid-winter's school day. The lengthy, cold bus ride home over jouncy, jutted gravel roads was finally over. Often I would pass the riding home time by pressing my nose and mouth against the frozen and frost-nipped bus windows and breathing warm air on them to make a melted spot just large enough to peek through. The barren Southern Minnesota farm fields fill up with snow so high that sometimes I could, in my imagination, pretend I was somewhere warm, like the dessert, staring at sand dunes instead of blowing, whisking snowflakes forming hills and valleys all over the county. By the time that golden yellow bus pulled up to my driveway the sun was in full sun set mode, falling lower and lower on the horizon. 

When I was young enough my mom was still home with the little kids and it wasn't unusual to open the front door and be comforted by the warmth of the wood stove and the smell of fresh baked bread and soup simmering on the gas stove. It always made my mouth water to see that homemade bread all brown and glistening with fresh butter on the cutting board. The soup though is a thing of beauty all on its own. The big kettle three quarters full, steam twisting, curling, unfurling from the open pot like young ferns do in the spring. 

After stomping the snow off my boots and peeling off layers of outer wear I would hurry over and see what kind we were having. Thick and bubbly split pea with chunks of potato? Chicken with carrots and spaetzle? Hamburger with tomatoes and corn? Ham and Bean? Oh the possibilities were almost endless. 

That steam would warm me right up and to this day I crave warm filling soup on a cold day. It is frugal, versatile, healthy, and easy!

I was given a ham bone after a Christmas party way back at the end of December and threw it in the freezer. Last week I decided it was time to cook that bone down and make some soup. I do not profess to be and expert, just a cook with a bit of experience. So here is my basics for ham stock. :)

Day 1:
Stock Pot
 I like this stock pot. It holds about 8 to 10 quarts comfortably. You want one that is deep enough to hold a chicken carcass and cover it with a couple inches of water.  This is a tutorial for ham bone broth but it could easily adjust for chicken or beef or even veggie broth. It was inexpensive for the amount it is used. On a side note I used it to water bath can some things last fall. It was a good investment.

Veggies and Bone
When I am trimming celery, or peeling carrots I will save those extras and bag them and put in my freezer for soup day. Instead of throwing out the bits of onion or garlic throw them in a bag and place in the freezer. When it comes time to make stock use those veggie bits and pieces instead of cutting up new ones. It is the ultimate in frugal cooking when you can use as much as possible and waste little .

Notice, as well, that the ham bone is fairly meaty. You want a bone that isn't picked completely clean. Those are still usable but make a thinner broth. I will usually try to leave, on purpose, some meat in the bag or on the bone. You will be thankful on soup day that you did. :)

Cloves, Allspice, Bayleaf
Place all those veggie scraps, your meaty ham bone, and some spices in the stock pot. Cover with water. I would use good old fashioned tap water if it is good to drink. Cover those veggies and bone fully, about two inches or so over the top. They need to be fully submerged. 

Apple Cider Vinegar
I learned to add an acid of some sort. This will, so I am told, help to pull all that goodness out of the bones. I have used a lemon, vinegar, red wine vinegar, or apple cider vinegar. A couple Tablespoons or a half a lemon should do it.

Now set that pot to simmer on a back burner, cover it up, and ignore it for the most part all day. I check every couple of hours to make sure it isn't dry or simmering too high. If you need to add water now and then, go for it. The idea is to slowly cook down that bone so that the meat will fall off and the marrow will leach out into the water, thus flavoring it. The longer you cook it down the better the broth. The meat and veggie should shrink down and the water should condense almost by half.
Please, do not rush this. Making good stock is an easy, basic, mostly hands off project. It does however take time. Give it the time it needs. A day is not an over estimate. I almost always cook for a day and then pick through the rest on day 2. 
That being said, at the end of the day, I take the whole pot and put it in the fridge over night.

Day 2:
Fat

Take that stock pot out of the fridge. The fat should have risen to the top. I skim the fat off and throw it. My dad would hate that. :) But I can't stomach it.

Strain the broth through a large colander.
Using a large colander, strain the broth through the first time to catch all the veggies and meat and bone.

Strainer.
I like to then use a fine sieve strainer to strain once more. This is preference and really not necessary.

Stock for the Freezer.
This particular time I got enough stock for a batch of soup in the crock pot (5 quarts), and was able to freeze about 9 cups of leftover broth. The picture above shows them in 2 cup Parmesan cheese containers. I mark them and date them before putting in the freezer. This stock is good for cooking beans, for flavoring rice, or adding to stew or soup when it has gotten too thick.

Pick through the colander.
Now onto the messy part. Pick through that leftover veggie/meat/bone mess and save out the meat. If I had more critters I would probably share that leftover bone, but our Miss Ivy Kitty is a Diva Cat and refuses to eat anything but her Friskies. Therefore, I chuck all this leftover in the garbage at this time. :)


I ended up with about a cup or so of meat. Now this is plenty for us as we are having Ham and Bean soup. If you need more, add from another source. 


Add that Ham to your soup stock.
At this point, your soup is ready for all the yumminess you can come up with. Add what your heart desires. Vegetables, beans, lentils, split peas, pasta. The possibilities with a good stock are almost endless.

Part 2 of this series will be my recipe for Ham 'n Bean Soup. It is filling to the tummy and good for the soul. Stay Tuned!

Always Blessed,
Gretchen :)
Possibly Linking With:


Wednesday, February 20, 2013

Granola Bar *Recipe


These are the most yummy homemade snack. 

I was hesitant to try a granola bar thinking that my kids would probably snub them. They are granola bar connoisseurs. When I quit buying pretty much all processed food snacks, granola bars were the last to go. They seemed so.... healthy. So the kidlets got an unhealthy taste for them.

On a family camping trip, my sister brought along her homemade granola bars. The kids snarfed them down like they were sneaking Easter candy. She was onto something. I thought though that they may be too much work. I don't really put time intensive snack making on my list of to-dos everyday so they just didn't get made.

Last week my Sara came over and showed me how to make them so I could bring them to a homeschool group Valentine party. They are so easy! She took all the pics and then blogged about it. My turn!

The original recipe came from a cookbook entitled Miserly Meals .

This is my version!
Oiling the Pans

Dry

Optional Yumminess

Mixing

Press in pan and Bake

Snacky Goodness


Granola Bars
2 cups rolled oats
1 cup whole wheat flour (could substitute if you can't do wheat)
1 cup brown sugar  (check out my substitute)
1/2 teaspoon baking powder
1 teaspoon cinnamon
1/2 teaspoon nutmeg
1 teaspoon sea salt
1 teaspoon vanilla
1/4 cup molasses
1/2-3/4 cup of honey 
*optional ingredients

Combine the dry ingredients.  Then add molasses, honey, and vanilla.  Use your hands to get it good and mixed up. (Perhaps you have helper for this job?) It should stick together, like you could roll it into a ball. If it is too dry add a bit more honey. If it is too sticky add a bit more flour. Press into a 9x12 pan that has been greased with coconut oil. Bake at 325 degrees for 15-18 minutes or until golden brown. Cool completely and then cut into bars. 

*OPTIONAL Yumminess can be added with the honey and molasses. Add 1 cup of any of the following: dried fruit (we did golden raisins, raisins, and dried cranberries), chocolate chips, coconut, sunflower seeds, or chopped nuts. Go and get your creative thinking cap on. These are so versatile!

These bars were crunchy and very satisfying. They would did make a lovely breakfast and snacktime treat. Enjoy!

Always Blessed, 
Gretchen  :)

Possibly Linking With:


Monday, February 4, 2013

Rosemary Spiced Squash *Recipe


Last week I shared a recipe for Ginger Lemon Squash. I am getting creative with my cooking because of our blessed abundance of squash. This week we are trying out a new concoction of rosemary, garlic and red pepper flakes! I really liked this one. :)


Rosemary Spiced Squash

Prep squash as per instructions found here.

Add to clean squash cavity:
1 Tablespoon of butter or coconut oil
1/2 teaspoon of dried garlic flakes
1 teaspoon paprika
1/4 -1/2 teaspoon of red pepper flakes
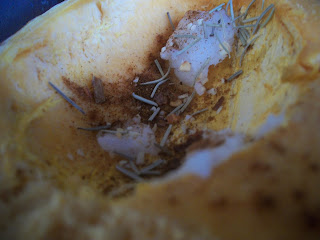
sprinkle of  dried rosemary
salt and pepper
Bake at 350 degrees for 30 to 40 minutes or until soft. Think: mash-able. 

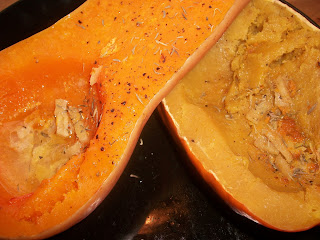
Acorn Squash with coconut oil and spices.

Butternut Squash ready to bake.

Tasty.

Always Blessed,
Gretchen :)

Possibly Linking With:

Monday, January 28, 2013

Ginger Lemon Squash *Recipe


Ginger Lemon Squash

Butternut and Acorn Winter Squash

We were blessed with so much squash this fall I have had to start getting creative with the squash side dishes in our world just to keep everyone from getting bored. :) So here begins recipe 1 of 4!


 Winter Squash Basic Baking Instructions
Scrub your squash clean.
Split it in half with a good, sharp knife. It can be difficult. Most winter squash has quite a hard rind. For Butternut Squash you will want to cut it lengthwise.
Hollow out the seeds and stringy stuff. 
You are left with a circular cavity.
Place the squash in a sided baking pan, I usually just use a cake pan, cut side up.
My mom always filled that cavity with a Tablespoon of butter and a sprinkle of brown sugar. (I still love squash this way!)
Now put some water in the bottom of that pan, say 1 cup or so. (It should not cover the squash, just come up a bit on the sides.)
Cover tightly with foil. You are essentially making a steam oven for your squash to bake in.
Bake 350 degrees for roughly 30 to 40 minutes. 
This can vary depending on your squash and your oven. The cooked squash will mash easily if it is done. We often serve it just like this but sometimes I mix it like mashed potatoes with a bit of milk.
There is your basic recipe!

Now for fun try the Ginger Lemon Squash.


Ginger Lemon Squash
Prepare squash as directed above.
Add to cavity:
1 teaspoon (or so) of peeled, grated ginger. ~I did not grate it, but you should. :)
1 teaspoon or so of grated lemon peel
1 Tablespoon of butter or coconut oil
sprinkle of dried thyme
sprinkle of dried rosemary
salt and pepper
Bake at 350 for approximately 30 min as per instructions above.


YUMM-O!


Always Blessed, 
Gretchen :)

Possibly Linking With:


Friday, December 28, 2012

Baked "Hard Boiled" Eggs *Recipe


My sister, Rosie, has been baking her hard boiled eggs since before Easter and she swears they are the best she ever made. At our Easter celebration last spring as he was struggling over the sink to salvage some part of his beautifully colored, hard boiled egg that I had brought, Handy Randy, her Hubs, even told me I have to bake them. I take this on good authority because he is a male foodie. (We don't call it being Picky around the Fam, it is referred to as High Taste, Foodie, or Connoisseur. *wink*)

Easy. 
Foolproof.
Peelable!

If there is one pet peeve I have about hard boiled eggs is that you never know if it will peel into perfect eggy goodness or if it will look like a foreign body usually found under the microscope. Not attractive when making deviled eggs. Or when your brother in law is trying to eat one at the Family Easter Dinner....

I thought that it would make a nice easy Christmas week breakfast so I decided to try out the baked "Hard Boiled" Eggs! 
I used a muffin tin as per instructed to hold the eggs in place. I did not preheat the oven. Bake for 30 minutes at 350 degrees. That is it! EASY!

Brilliance!

Perfect eggy goodness.
Those Beautiful Brown Speckles are normal.


All photos are courtesy of Sara Rose Nissen. You can check out her stuff over at as seen through my eyes

Now time to officially fess up. On my trial run of The Baking Of the Hard Boiled Eggs my eggs did not set.... because my oven has apparently given up its bottom coil. Pesky electric ovens! Before it blew up, the coil not the oven, my eggs were on there way to perfection. I shall retry when we are recoiled and heating again. :)

Let me know how it goes!

Always Blessed,
Gretchen :)


Possibly Linking With:
Cornerstone Confessions
Wisdom Wednesdays and Link Up
No Ordinary Blog Hop
Frontline Moms Friday Fun
The Welcoming House

Thursday, November 29, 2012

~Baked Pumpkin French Toast


 Baked Pumpkin French Toast
Yes, that is a pool of half and half..


I found this amazing baked french toast recipe over at smittenkitchen a few weeks ago and we already made it twice and loved it. It is super tasty and doesn't call for hoighty-toighty things. It can be made the night before and cooked for Brunch or made in the morning and then it is ready to pop in the oven at suppertime. It is slightly putzy but worth every bite. Makes me want to buy her cookbook. Cookbook found here!

We were blessed with a gift of so many pumpkins this year that I am trying to come up with creative ways to use them. We have had pumpkin bread, pumpkin pie, pumpkin soup, pumpkin fries, and pumpkin stew. It was time to tackle another adaptation!

I took this amazing recipe and adjusted it for us to use pumpkin puree with the basic ingredients and method she used over at smittenkitchen. I tweaked a few things and it turned out beautifully. Please don't judge it (or me!) based on the pictures. I try, but I don't have the talent or the camera my sister has and this was a heartfelt attempt to capture the pumpkiney goodness.

 Baked Pumpkin French Toast
1/2 cup granulated sugar
1 tablespoon ground cinnamon

1/2 teaspoon nutmeg
1 teaspoon ginger
1/4 teaspoon allspice
8-16 slices sandwich bread (if using homemade it will be less slices)
1-1 1/2 sticks butter, softened
1 cups skim milk

2 cups pumpkin puree
9 large eggs
1/4 teaspoon table salt
1 teaspoon vanilla extract

1 teaspoon maple flavoring (over by the extracts)

Preheat the oven to 450 degrees. Mix the spices and sugar together and leave in a small bowl.  Place the sliced bread on cookie sheets in a single layer. Spread each slice of bread with butter, then sprinkle each slice with some of the sugar-spice mixture. Pretend like your making cinnamon toast! Toast the trays of bread in the oven. When they are lightly browned, 6 or 7 minutes, take out of the oven and set aside to cool a bit. It smells so good right now! Lower the oven temp to 375 degrees. 

Butter your 9 x 13 pan and then shingle layer your toasts in the pan. Try to make them kinda even. End with a half slice at the end of the row.

Whisk the rest of the ingredients together. The pumpkin makes it a slightly heavy custard. Feel free to sprinkle a little bit of nutmeg and ginger in the wet mix. Pour as evenly as possible over the toasts. Let sit for at least 15 minutes (or overnight) so all that pumpkin goodness seeps into the bread. {Just a quick Minnesota pronunciation lesson my friend M would appreciate... Minnesotans say Toast like Toe-st. Felt like I needed to get that out because I have typed Toe-st so many times. :) }

Sprinkle with remaining sugar spice mixture and bake for around 30 minutes. You want it to be a little bit puffed up and solid. You don't want any liquid floating in the pan. Cut and serve with maple syrup, use the real stuff if you can because it is SO MUCH BETTER and you need less.


Sugar n' spice toasts.


Shingled toasts covered in pumpkin custard and spiced sugar.


We served it with maple syrup and a drizzle (wink) of half and half.


Nummy. Easy. Serve with fruit and it is a done deal meal.

:) Enjoy!

Always Blessed,

Gretchen :)