Thursday, February 14, 2013

Easy-Peasy Homemade Greek Yogurt *Recipe

Homemade Greek Yogurt

Warning: Picture Ladden Blog Tutorial!
Why: Because I learn better with pictures and because I have done this wrong more times than I'd like to admit.  Pictures help you do it right!

2nd Warning: You will love your own yogurt so much you will never waste money on store bought again. Unless of course you run out during the summer because the kids eat it like ice cream. :)

I can be a slow learner. Gulp. Tough to admit but true nonetheless. So when I first decided to make yogurt I scoured the internet. I pinned on Pinterest. I searched cookbooks and photocopied recipes from the 70's. Everyone had the best idea and way to do it. They were all similar, and yet the steps were sometimes different. After wading through the helpful Blogosphere and checking on all types of milk and yogurts to culture with (did you know you can buy just the culture through the internet?) I came up with a pretty solid plan. I have now been successfully making yogurt for almost a year.

Easy-Peasy with these directions. I'll be sure to let you in on the whoopsies I had along the way and hopefully you can avoid them. :)


Easy-Peasy Greek Yogurt


Start with about one gallon of milk. We have tried whole, 2%, and skim. I like the skim milk yogurt because it has more 'bite' to it. I have also tried organic and there was no noticeable difference. I have a friend that uses raw milk and she says it is divine. Heat this milk till it is warm enough to be uncomfortable if you dip your pinky in for more than 20 seconds. Totally scientific, huh? If it is too hot it will kill the yogurt culture. Too cold and it won't grow properly. I usually stick it in the Crockpot on low for about an hour or so. Stir occasionally. (Do not be embarrassed to set a timer to remember to stir it. I would forget to change clothes out of the dryer if I didn't set the timer.)


You will need a 1/4 -1/2 cup of a yogurt culture to start your batch. I use a plain Greek yogurt. The plain regular style yogurt will work as well but I have had better and more consistent results with a Greek style thick yogurt.


When the milk is warm take about 1 cup of it and place in a bowl with 1/4-to 1/2 cups of the store-bought yogurt. This is a tempering process. You want to slowly incorporate the yogurt to the milk in the Crockpot and keep the temperature fairly even. By adding a small amount of milk to your yogurt and then mixing it you have a thinner yogurt culture and a similar temperature to place back into Crockpot.


Once the yogurt and 1 cup of milk are mixed it looks like this. Pour this mixture back into the Crockpot.


Pour it slowly. 


Give it a gentle stir to incorporate your tempered yogurt mixture into the warm milk in the Crockpot.


Unplug it! (Please don't forget this while you are answering the phone and a question about fractions while sending your toddler to take a potty break.) Place a lid on it. I like to flip the lid upside down so it sits tighter.


Now I usually cover the Crockpot in numerous bath towels and leave it covered on the counter for about 10 hours or overnight. The towels act as an incubator to keep the heat in and help the yogurt to form within the Crock. This works so surprisingly well! However, if you don't have a lot of counter space.....


... you can place it in your empty, cold oven wrapped in towels overnight and up to 12 hours. From personal experience and a melted Crockpot I will insist you find some way to remember that you have a Crockpot and a bunch of flammable towels In Your Oven. I use a sticky note that resides on my 'Bake On' button the moment I place that yogurt in the oven. Trust me when I tell you melted Crockpot electric cord and singed towels stinks up your house and causes your 9 year old to consider calling 911. Use the Sticky Note. :)


Okay! It has been 10 hours! This is a properly set yogurt. It is firm and jiggly; a bit like jello. There is some liquid around it. That is whey. 


Line a large colander with some cheesecloth. This is a double layer because I cut it too short in my it is the beginning of the day and I am half asleep so where in the world is my coffee stupor. Usually I use a single layer. Place that lined colander over a mixing bowl.


Pour the yogurt into the colander. 
If you want a regular style yogurt after this initial straining you are done. 
Place in the fridge and eat up!


If you are looking for Greek yogurt then fold the cheesecloth over the yogurt and place in fridge. Let it strain. Anywhere from 3 hours till 6. Let it go too long and you will have a Ricotta style soft cheese.


The yogurt will be very firm and creamy. Usually there is a slight indentation of the cheesecloth on the yogurt.


Pull the cheesecloth off and place your Greek Yogurt into a storage container.
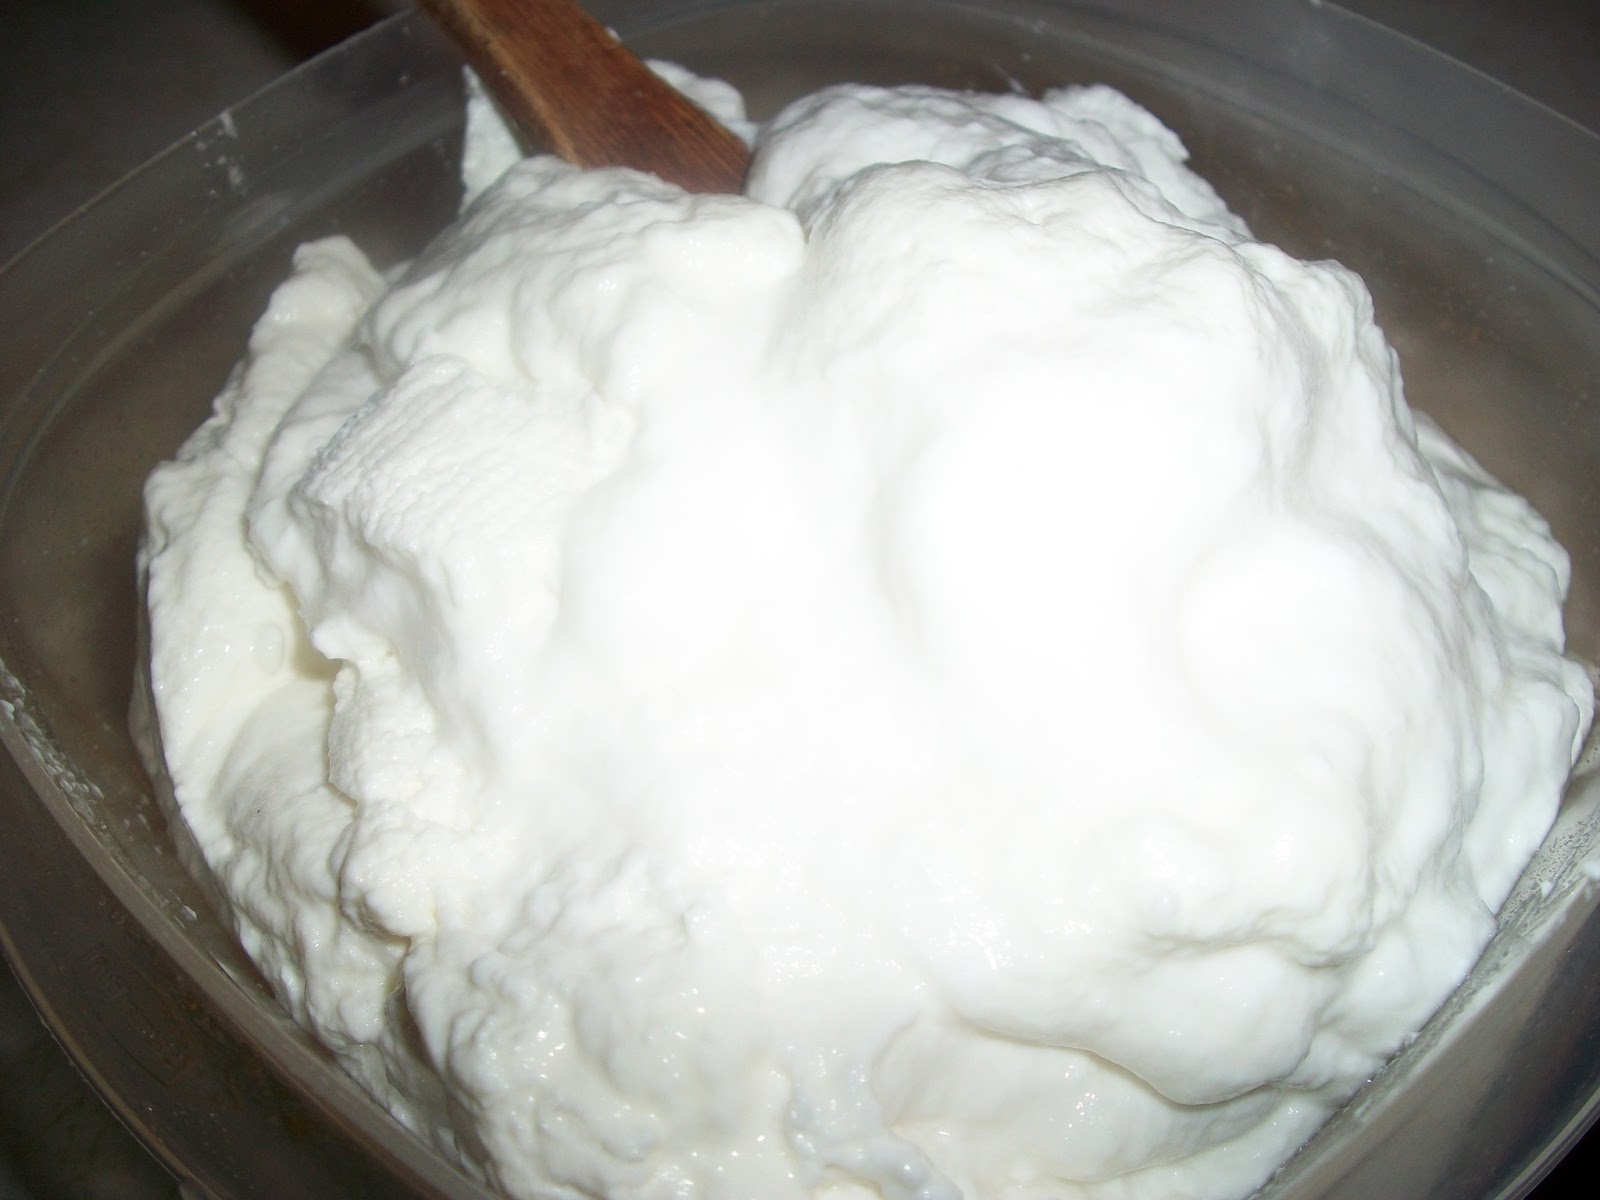

There it is! I store mine in a small Rubbermaid container. This one has a 4 cup capacity.


Don't throw out the whey that has strained out of the yogurt. It can be used in place of milk in most any baking item or for cooking. I have used it in homemade bread, pancakes, and homemade hamburger hotdish. 
Store in the fridge in another container. 
Please don't put it in a juice pitcher because some unsuspecting teenager or husband may think it is lemonade and have a very large swig. It does not taste like lemonade. 


 Serve with honey or homemade preserves and some granola. Yumm-o!

We also use Greek Yogurt in place of sour cream, for recipes asking for mayo and in any dips I make.

ENJOY!

Always Blessed,
Gretchen :)

Possibly Linking With:

Sunday, February 10, 2013

Make Your Own Brown Sugar *Recipe


 "It is the sweet, simple things of life which are the real ones after all."~ Laura Ingalls Wilder
cane sugar and molasses


I grew up making brown sugar every time we had a need for it. Somewhere along the line I stopped making it myself and resorted to buying it simply because it saved me an extra 3 minutes in my kitchen. I started up again last year to save me the three dollars and because I have been trying to get back to the basics. The ones I learned from my mama as a child.

Since I am head chef and baker in this house, we are transitioning into more honey, molasses, and (slightly less refined) cane sugar and using much less refined white sugar. I am not the sugar police; just trying to do better with more whole type kind of foods. 

I have yet to see a brown sugar substitute of a healthy variety in my local area, so I decided to give my childhood brown sugar recipe a try with the cane sugar I have using. The granules are larger and look different so I wasn't sure.

It turned out lovely! I have used it interchangeably in several recipes that called for regular brown sugar. I see no noticeable difference in taste or texture. *I'm not sure how it would work in candy, such as a caramel. If you try it let me know!

cane sugar

molasses

mixing

brown sugar!

Brown Sugar
1 cup cane sugar (or white sugar)
1/8-1/4 cup dark molasses 

Mix with a fork until the molasses is fully incorporated. The less molasses the lighter the brown sugar. Use more molasses for darker brown sugar. The cane sugar does not 'pack' into a measuring cup as well but I have had no problem with it working. Use equal measure for regular brown sugar.


Always Blessed,
Gretchen :)
Possibly Linking With:

Quote from: http://www.searchquotes.com/quotes/author/Laura_Ingalls_Wilder/3/

Friday, February 8, 2013

Purple Fur and the Silver Moons


This morning on my way to drop Princess Peony off at school we passed this group of youngsters trudging through inches of snow on a not yet shoveled sidewalk. One of those boys was dressed in an extremely out-of-date snowsuit. I could almost see the silver belt buckle in front that screamed 'I was made in 1985!" My heart went out to that child. That old hand-me-down snowsuit or pair of boots can be cause for extreme, elementary school persecution.

I silently thanked God for Homeschool friends, Church Folk, Thrift Stores, and Clearance Sales.

My children proudly wear thrifted items. We almost never buy things full price. I have been blessed with left over clothes and hand-me-downed closets on many occasions. God has always provided. We often receive things that are nicer than what I would spend money on.

We do have a few standards with the used clothes. No underwear. No inappropriate tees even if it was free. If they really hate it, and I can find it elsewhere, we skip it. If not, they wear it and become a better adult through a tough lesson. 

I think this stems from my year with the Purple Fur Coat and Silver Moon Boots.

My parents were very hard working folks. My dad sold seed corn and soybeans to farmers and as a result we moved from town to town as his job transferred him from area to area. I think often they had a lot to pay Peter and Paul was calling in his loan. 

My mom could make a divine meal out of potatoes, WIC cheese slices, and a bunch of celery. I think she excelled at making us feel full, warm, and rich in all the important things. She taught me to cook down a chicken, knead bread dough, and make a pound of burger stretch a mile and three quarters. She taught me to grab eggs from under an ornery hen, stay out of the goats way, and love the rabbits a bit less because they would be for supper someday. She taught me the beauty of a Marigold was as important as the first ripe tomato in July. 

I never really knew we were poor. I knew we were loved.

Then came the winter of my third grade year. I knew things were different in our family. It was my first realization of not having what others had. I did not have the cool jeans with rainbows on the back pocket. I did not have a polo shirt with a little embroidered horse on the left shoulder. I did not have pretty hair ties, or leg warmers, or Strawberry Shortcake erasers. My backpack was used and didn't have little beaded safety pins hanging from it. I didn't even have a friendship bracelet! My clothes were suddenly wrong even though they had always been okay.

The pinnacle of understanding my differentness came at the first snow. My coat didn't really fit. I remember standing in the local department store with my mother staring longingly at the beautiful ski jacket on display. It was one of those puffy jackets with the western style trim and pearly looking buttons. The top portion above the white piping was a darker blue and the bottom half lighter. It had a metal ring built in for your super cool ski gloves to hook on to. The jacket was shown with matching bib overall snowpants and a fun knit hat with a big fuzzy ball on the top. 

Man, did I want that jacket. I instinctively knew that the blue ski jacket would make me fit within the confines of normal. I could blend in seamlessly with the rest of the class. Ah, what peace it would be. I just wanted to blend in. To be unseen.

I knew however, that it was not to be. I followed her out of the store still thinking about that jacket and about how my current coat was too short in the arms and the snow would get it and freeze up my wrists. My back peeked out if I bent over. My boots didn't fit and stunk like wet bread bags. With a 1/4 mile driveway to walk to the bus every morning that would start to be a problem awfully soon. Winter in Minnesota is merciless even in a mild year.

Mom had been given some bags of clothes for us kids from some kind soul. It was probably a neighbor or church friend who saw my exhausted parents shuffling into service every Sunday dragging twin babies, a preschooler, and me lagging behind. We were always taken care of but I remember her looking so sad so often. Poverty can be a weary place for your soul. Still, God provided for us through my mother's diligent prayers and trust.

I can see the purple fur jacket peeking out of the bag in my mind's eye. It was a pinkish, purple, fuzzy fur. The coat was like a navy pea jacket with the square of buttons in front. There were four of them colored a dull brass like an old used tea pot. I think they were suppose to look like coins with a Roman solider on them. The really horrible part however, was the white, faux fur, trim speckled with black dots. I believe the manufacturer was going for a queen's robe meets a Roman sailor on the good ship Lollypop look.  

Oh, how I repelled inwardly. This was nothing like the sleek, shiny, blue ski jacket.

My mom held it up and judged the size. I knew it was mine. 

So there was my winter coat. I was going to be the tail end of every joke the cool kids could come up with. My eyes filled but I did not show it. I knew I should be grateful to have a coat. The knot in my throat was so hard it hurt and I turned away.

"Look! Boots, too!"

With some apprehension I turned to see my new boots. Oh please could they not match the coat?!

Oh they didn't match the coat. Nope. They didn't match anything. They were shiny, silver moon boots. Boy moon boots. With huge, thick heals and silver laces. They went clear up to my knees and glowed like a bad sci-fi movie. They needed a ski jacket and a boy!

Really? Shall we just stick a Bull's Eye on my forehead?

"Thanks, mom."

I absolutely hated that jacket. I loathed the boots. However, I new it was the best my parents could give and I knew I shouldn't complain. (I am sure I did a bit....)

I wore them.

Grudgingly I admit, they were warm. I was teased. I was laughed at. It was embarrassing to be seen in. I stuck out like a huge purple, fuzzy, Ewok amidst the Sking Crowd. But, I sure was warm.

The lesson learned: Be thankful in all circumstances.

What a gift that is. What an amazing lesson! What a work the LORD has done in my life with a lesson began before I even knew who He was.
 pray continually,  give thanks in all circumstances; for this is God’s will for you in Christ Jesus. ~ 1 Thessalonians 5:17-18

So, sometimes, make them wear that ugly, old, out of date, piece of clothing. It builds character and thankfulness.

Always Blessed,
Gretchen :)
Possibly Linking With:


Thursday, February 7, 2013

Goin' Crunchy~ DIY Furniture Polish


Lemon Juice, Olive Oil, and Lemongrass Essential Oil

I really like how furniture polish smells. The lemony fragrance brings me back to my childhood. I have chatted before on how much I love to clean. Sometimes to a fault. I think it was probably groomed into me from the time I was able to hold a cloth and dust. 

The house I did most of growing up in was an old turn of the century two story farm house. My mother would run about fruitlessly trying to keep up with the country dust that whipped across the open fields and deposited rich black topsoil and brown gravel road dust all over the house. The wood floors caught it and so we dusted those daily. The couches and coffee table hid dust of the bunny variety. So there was weekly cleaning to catch those gray fuzzy bunnies. In the summer, when the windows were let open to bring in a breeze, I could wake up and find dust on the kitchen table in a light layer just waiting , begging me to write HELLO with my pinky finger. We rinsed cups before using them even if they came out of the cupboard. It was really everywhere. 

My brothers were often regulated to more manly type jobs but I honestly think she just didn't trust them to not waste a whole can of dust spray and go through three dusting rags just on the dining room. So my sister and I got to dust. With rags and special dusting mops! With lemony furniture polish that we could spray on the antique, wooden, buffet table and desk that shined it right up.

I love the instant gratification of a good dusting. I mean, you can SEE the clean! And the house smells clean, even if it isn't in the most tip-top shape. So now it is my Prince Ray's job to once a week dust up this house. He generally talks Princess Petunia into helping him and her little 2 year old self is so very proud to help with a big kid chore. He does not think it manly enough but is willing to to do it without complaining (usually) 'for Princess Petunia'. 

A clean dusting of the house always makes me feel better. Yes, I know. Sounding a bit off kilter? I come from a long line of neurotic cleaners. If Lemon Dusting Spray makes me feel better, then so be it. 

So in my search to make my own cleaning supplies I found a good one here and here. I tweaked the recipe and this now my favorite for homemade Lemon Dusting Spray. 


oil


lemon


water


DIY Lemon Dusting Spray
one 4 oz spray bottle
1/2 teaspoon of olive oil
3 teaspoons lemon juice
10 drops of Lemongrass Essential Oil (or lemon, or orange...)
distilled water *
Using a funnel to pour into the spray bottle, combine the olive oil, lemon juice, and essential oils. 
Fill the rest if the bottle with distilled water.

When using: shake the bottle well before using and spray on soft cloth or directly on the furniture. Wipe clean! :) This can be doubled or tripled but I usually just make it as I need to. Smells like summertime and childhood.

*distilled water is just filtered, boiled, and then cooled water. Any possible organisms in your water are then killed and thus a product that does not turn into a science petri dish.

So make some better for you and the environment, frugal, Lemon Dusting Spray and then DUST IT!


Always Blessed,
Gretchen :)

Possibly Linking With:


Wednesday, February 6, 2013

*Homeschool~ Shakespeare Study for Kids


Shakespeare for kids? Yes! 

It is part of our Ambleside Online Year 1 Literature schedule to read several different plays from Shakespeare each Term.  Year 2 has a Literature schedule with different plays. We have been getting quite a bit of Shakespeare in this year!

In the younger years it is suggested that Shakespeare is read from a storybook format of the plays. We are using Tales From Shakespeare by Charles and Mary Lamb. This is our second year reading from Tales and it is wonderful. These are not by any means easy reading and so they are great read-alouds for both the boys. I have been surprised at how how much they retain from these readings. Even in this more simplified version the reading is complex and has a lot of 'meat' to it. We usually take 2 to three days to read it. I take just a bit at a time, and have them narrate back to me orally. 

A well loved copy of Tales From Shakespeare.


Why would we take the time? 
Why bother with Shakespeare? 
Is it even appropriate for reading to children? 

I had all these questions when I started teaching it last year. I had always associated Shakespeare with more of a secular and frankly, a quite bawdy reputation. While I was excited to try reading the plays to them I thought to myself that they would never be able to follow along. The plots are sometimes confusing, evil and good are often mixed up, and sin is prevalent. Not to mention the tragedies are so very heart wrenching, I wondered if it would affect them negatively.


Surprising to me, they actually like to do Shakespeare readings. Who knew?! They pick up on far more than I ever expected. Sir Bean has especially connected with certain themes. He will often tell me weeks after we have read a play that he was thinking about it. 
Remember when we read about the king who was so angry he didn't talk to his daughter? She just told him the truth! And he got mad at her! Then she had to leave and he got sad but he was too proud to say it. That was wrong. He was wrong.
That was after we read King Lear. We learned that pride goes before the fall (Prv 16:18) and that we all sin and fall short of the glory of God (Rom 3:23). We then Netflixed a BBC version of it and both boys were able to tell dad everything that was happening.


Scene from King Lear. (source)

We have actually had Bible studies spring forth from our Shakespeare study. Shakespeare had a way of making characters much more believable, much more real-life if you will, then most modern day writings. He did not shy away from subjects that are still sometimes taboo in our current world. Good is not always all rosy and pink and bad is often found redeeming itself. I think that is such a positive message to give our kids. In Shakespeare, there are stages of gray in what can seem like a black and white world. What better way to start a conversation on those gray areas than after reading about them?

I strongly encourage any homeschool mom to look into reading a bit from Tales From Shakespeare! It has been a very gentle way of 'getting to know' the works of William Shakespeare.

To supplement the reading I also search out videos from Youtube so we can see the play or at least a child friendly rendition of it. Please do preview them as some subject matter is better left for your teens and you to discuss. I have had good luck with the Youtube channels Shakespeareanimated and VideoSparkNotes. My kids have enjoyed watching these videos more than once.

I often let them draw pictures of the play while I am reading it. This drawing page might help with inspiration! You can purchase coloring books everywhere online but I haven't found free ones yet. ;)

For notebooking I have used these  and also these free resources.

I also will use LibriVox when I am short on time and need another reader. LibriVox offers thousands of audio books for free. I can put on a reading while we are making supper or doing dishes and then we discuss it just as if I had read it to them.

Their absolute favorite thing about reading Shakespeare has to be the acting out of the plays. I will find them acting out the scenes on their own. Sir Bean and Prince Ray especially like the fighting parts... but I think Princess Petunia prefers to be, of course, The Princess in every play.

What resources have you used for teaching Shakespeare? How do you teach it?

Always Blessed,
Gretchen :)

Possibly Linking With:

Tuesday, February 5, 2013

Tuesday's Gifts~ Wisdom Seeking


Wisdom. A goal to be reaching for. 

A gift God gives.
For the Lord gives wisdom;    from his mouth come knowledge and understanding.
~ Proverbs 2:6
If I but ask for it.

 If any of you lacks wisdom, you should ask God, who gives generously to all without finding fault, and it will be given to you.
~ James 1:5
And a promise to cling to.
13 Happy are those who find wisdom,
    and those who get understanding,
14 for her income is better than silver,
    and her revenue better than gold.
15 She is more precious than jewels,
    and nothing you desire can compare with her.
16 Long life is in her right hand;
    in her left hand are riches and honor.
17 Her ways are ways of pleasantness,
    and all her paths are peace.
18 She is a tree of life to those who lay hold of her;
    those who hold her fast are called happy.
~ Proverbs 3: 13-18 
Striving.


Seeking.


Sentinel.

Always Blessed,
Gretchen :) 


All pictures are courtesy of my sister, Sara Rose Nissen.  
Check out her artwork over at  as seen through my eyes. :)

Possibly Linking With:

Monday, February 4, 2013

Rosemary Spiced Squash *Recipe


Last week I shared a recipe for Ginger Lemon Squash. I am getting creative with my cooking because of our blessed abundance of squash. This week we are trying out a new concoction of rosemary, garlic and red pepper flakes! I really liked this one. :)


Rosemary Spiced Squash

Prep squash as per instructions found here.

Add to clean squash cavity:
1 Tablespoon of butter or coconut oil
1/2 teaspoon of dried garlic flakes
1 teaspoon paprika
1/4 -1/2 teaspoon of red pepper flakes
sprinkle of  dried rosemary
salt and pepper
Bake at 350 degrees for 30 to 40 minutes or until soft. Think: mash-able. 

Acorn Squash with coconut oil and spices.

Butternut Squash ready to bake.

Tasty.

Always Blessed,
Gretchen :)

Possibly Linking With: